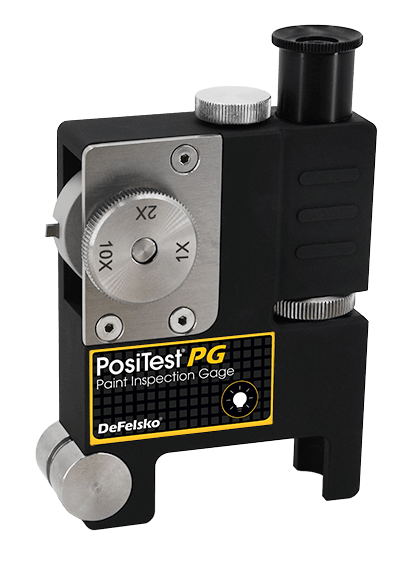
- Durable anodized aluminum housing
- Rotating cutting tip holder holds up to four cutting tips
- Powerful 50x microscope with precision optics and rotating scale in Imperial and Metric Units
- Certificate of Calibration showing traceability to NIST included
- Ideal for coatings up to 1,250 µm (50 mils) depending on cutting tip—1x, 2x, and 10x tips included (5x cutting tip available)
- Keeps up to four cutting tips secure and ready for use
- Uses one, easy to change AAA battery
- Integrated bright white light with easy on/off and automatic timer to conserve battery life
- Durable anodized aluminum housing with rotating cutting tip holder
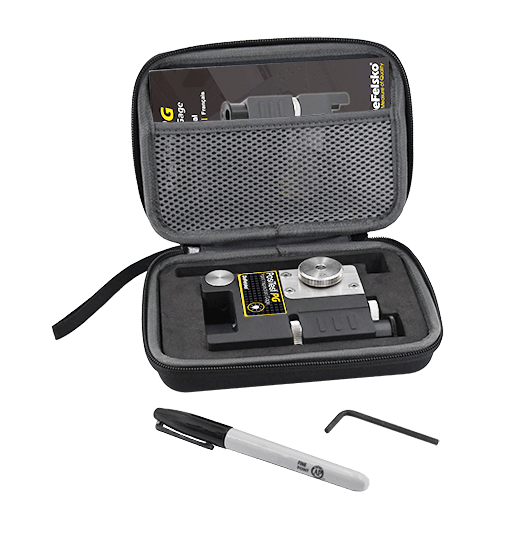
- Includes all tools and accessories required for testing in accordance with national and international standards
- Two year warranty
- Long Form Certificate of Calibration showing traceability to NIST included
- Powerful 50x microscope with precision optics and rotating scale in Imperial and Metric Units for quick and accurate measurement
- Large field of view provides a comfortable eye distance with or without glasses
| Cutting Tip | Conversion Factor | Rang (µm) | Range (mils) |
|---|---|---|---|
| 1X | 1 | 0 - 1,250 µm | 0 - 50 mils |
| 2X | 0.5 | 0 - 625 µm | 0 - 25 mils |
| 5X | 0.2 | 0 - 250 µm | 0 - 10 mils |
| 10X | 0.1 | 0 - 125 µm | 0 - 5 mils |
| Cutting Tip | Accuracy (mil) | Accuracy (µm) |
|---|---|---|
| 1X | ± 1 mil | ± 25.4 µm |
| 2X | ± 0.5 mil | ± 12.7 µm |
| 10X | ± 0.1 mil | ± 2.5 µm |
Paint inspection gages, such as the PosiTest PG Paint Inspection Gage, are used for the destructive measurement of single layer, total thickness, or individual layer thicknesses of paint and coatings on rigid substrates like metal, plastic, wood, and more.
What cutting tip should I use for my application?
Select a cutting tip based on the expected coating thickness chart above. If the coating thickness is unknown, perform an initial measurement using the 2X cutting tip.
Is the PosiTest PG able to measure coating thickness on non-metal substrates?
Yes. The PosiTest PG Paint Inspection Gage is a precision instrument used to measure the total coating thickness or the individual layer thicknesses over any rigid substrate including metal, wood, and plastic.
Can the PosiTest PG measure the thickness of the individual layers of a multi-layer coating system?
Yes. The PosiTest PG can measure the individual layer thickness of a multi-layer coating system provided that the layers are of a different color. Successive, contiguous coats should be of contrasting colors to aid sharp discrimination of coating interfaces (ASTM D4138).
Can the PosiTest PG measure the thickness of metallic coatings?
Yes. The PosiTest PG can be used to measure plating thickness on metal, ceramics, plastics, and more.
Can the PosiTest PG measure on curved surfaces?
Yes. Per ASTM D4138, the measurement surface may be flat or moderately curved. Pipes as small as 25 mm (1”) in diameter may be measured in the axial direction.
When should I replace a cutting tip on the PosiTest PG?
If the cutting edge is damaged or dulled, the tip should be replaced. A dull blade may not cleanly cut the coating, making it more challenging to determine a measurement. To replace the cutting tip, rotate the cutting tip holder into position and loosen the hex screw using the included wrench. Remove the cutting tip and install a new one such that the tallest part of the cutting tip is closest to the selection dial. Ensure that the tip is fully seated and retighten the hex screw firmly.
How accurate is the PosiTest PG Paint Inspection Gage?
The accuracy of the PosiTest PG is dependent on the cutting tip used.
How do you read a paint inspection gage?
When measuring, it is often beneficial to line up one of the major graduation marks with the edge of the coating. It is not necessary to align with the zero mark on the scale.Record the width of the cut, measuring from the edge of the substrate to the edge of the contrasting mark, by counting the number of graduations.Multiply the measured width of the cut by the conversion factor from the table above to determine the coating thickness. If measuring a multilayer coating system, the width of each individual layer may be recorded.
What is the best way to take an image of the cut of a paint inspection gage?
You can take images of the cross-sectional cut under magnification using a cell phone or camera with a macro lens. Depending on the make of the phone/camera, different techniques or modes may provide better images. For Apple iPhone users, Portrait mode typically provides excellent results.
| Item | Description | Price | ||
|---|---|---|---|---|
PGKIT | PosiTest PG Coating Thickness Gauge with 1x, 2x, 10x Cutting Tips, and Long Form NIST Cert | $995.00 | ||
| Accessories | ||||
PGCUTTER1X | 1X / 45 Degree - Replacement Tungsten Carbide Cutting Tip for PosiTest-PG | $80.00 | ||
PGCUTTER2X | 2X / 26.6 Degree - Replacement Tungsten Carbide Cutting Tip for PosiTest-PG | $80.00 | ||
PGCUTTER5X | 5X / 11.3 Degree - Replacement Tungsten Carbide Cutting Tip for PosiTest-PG | $80.00 | ||
PGCUTTER10X | 10X / 5.7 Degree - Replacement Tungsten Carbide Cutting Tip for PosiTest-PG | $80.00 | ||


