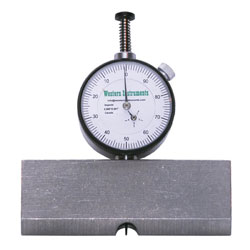
The Western Instruments N88-3 Basic Plus Dial Indicator Pit Gauges allow the Corrosion Inspector to conveniently measure Pit Depth or material loss in areas of Weight-Loss Corrosion. Various Blades for the Pit Gauges are available for different applications, including the Bridging Pit Gauge which permits Inspectors to Span or Cantilever over large areas of Weight-Loss Corrosion, to get a true measure of Pit Depth.
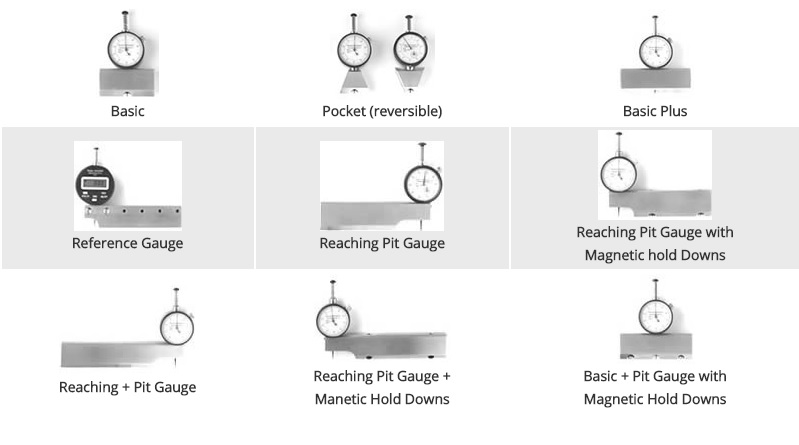

- N88-3 Basic Plus Pit Gauges with Dial or Digital Indicators
- Measuring Ranges x Resolution: 14mm x 0.01mm, 0.550 x 0.001 inch
- Center-mount 3-1/4 inch (82 mm) Blade
- Includes Manufacturer's Certificate
| Metric Dial Indicator | Imperial Dial Indicator | Digital Indicator |
|---|---|---|
| Range: 0.0-10mm Resolution: 0.01mm Dial Diam: 35.5mm | Range: 0.0-0.5" Resolution: 0.001" Dial Diam: 1.4" | Range: 0.0-0.5", 0.0-10mm Dial Diam: 56mm, 2.2" |
| 1-Standard Tip | 2-Conical Tip | 3-Needle Tip |
|---|---|---|
| 0.040" diam. | 0.010" diam. | 0.005" diam. |
| #1 Contact Point-Standard N88-S | #2 Contact Point-Conical N88-C | #3 Contact Point-Needle N88-N |
Western offers a variety of Contact Points, which are all 0.625" (16mm) long. Any ADG Contact point can be used with our special dial indicators, but a different length may affect Height Zeroing, or the vertical position of the Dial Indicator. Contact Points are easily replaced, by extending the Contact Point , and turning it counter clockwise.

The vertical position of the Contact Point, needs to be Zeroed with respect to the Knife Edge of the Blade. Zeroing can be accomplished in two ways; by adjusting the Height of the Dial Indicator in the Blade; or by Rotating the outer Bezel Scale while pressing on the Plunger onto a flat surface.
To quickly check the Zero Point of the Dial indicator, place the Blade on a representative smooth surface. Gently press the Plunger, until the contact point touches the surface. While the contact point is on the surface, loosen the Bezel Lock, and rotate the Bezel Scale until it reads '0' with respect to the pointer.


Loosen the Fastener(s) holding the Dial Indicator in place. Hold the Blade firmly on a Flat Surface, and gently press the body of the Dial Indicator down until the contact point touches the flat surface. Carefully re-tighten the Clamp Fastener(s) or the Set Screw. Any fine zeroing can be done by rotating the Bezel Scale on the Dial Indicator.
Height Zeroing should be done, whenever the unit is put into to use.


Digital Indicators can be Height Zeroed or Positioned in the same way as a Mechanical Dial Indicator. To Zero the Digital Indicator simply press the Zero Button when the Contact Point is on a reference point. If the Digital Indicator is Height Zeroed, press Zero when the Plunger is fully retracted.
 To select Metric or Imperial Measurement, simply press the mm/in Button.Whennot in use, press the On/Off Button to turn the Indicator off.
 To select Metric or Imperial Measurement, simply press the mm/in Button.Whennot in use, press the On/Off Button to turn the Indicator off.
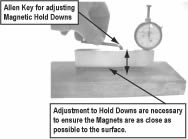
Magnetic Hold Downs need to be adjusted to fit the surface being tested. If the surface is flat or convex, the Hold Downs can be adjusted, with the Allen Key, to be flush with the knife edge of the blade. However, is the surface is curved (concave), like the inside of a vessel, the Hold Downs need to be adjusted so they dont interfere with the knife edge of the Blade

| Item | Description | Price | ||
|---|---|---|---|---|
Inch Basic Plus Pit Gauge, Centre Mount 3.5 in (82mm) Blade | $435.00 | |||
Metric Basic Plus Pit Gauge, Centre Mount 3.5 in (82mm) Blade | $446.00 | |||
Digital Basic Plus Pit Gauge, Centre Mount 3.25 in (82mm) Blade | $649.00 | |||
| Accessories | ||||
Standard Tip #1, for N88 pit gauges | $17.00 | |||
Conical Tip #2, for N88 pit gauges | $17.00 | |||
Needle Tip #3, for N88 pit gauges | $50.00 | |||
In stock
1 Week Lead Time (Estimated)
2-3 Week Lead Time (Estimated)
Lead Time Varies, Please contact us for availability.
Unavailable

