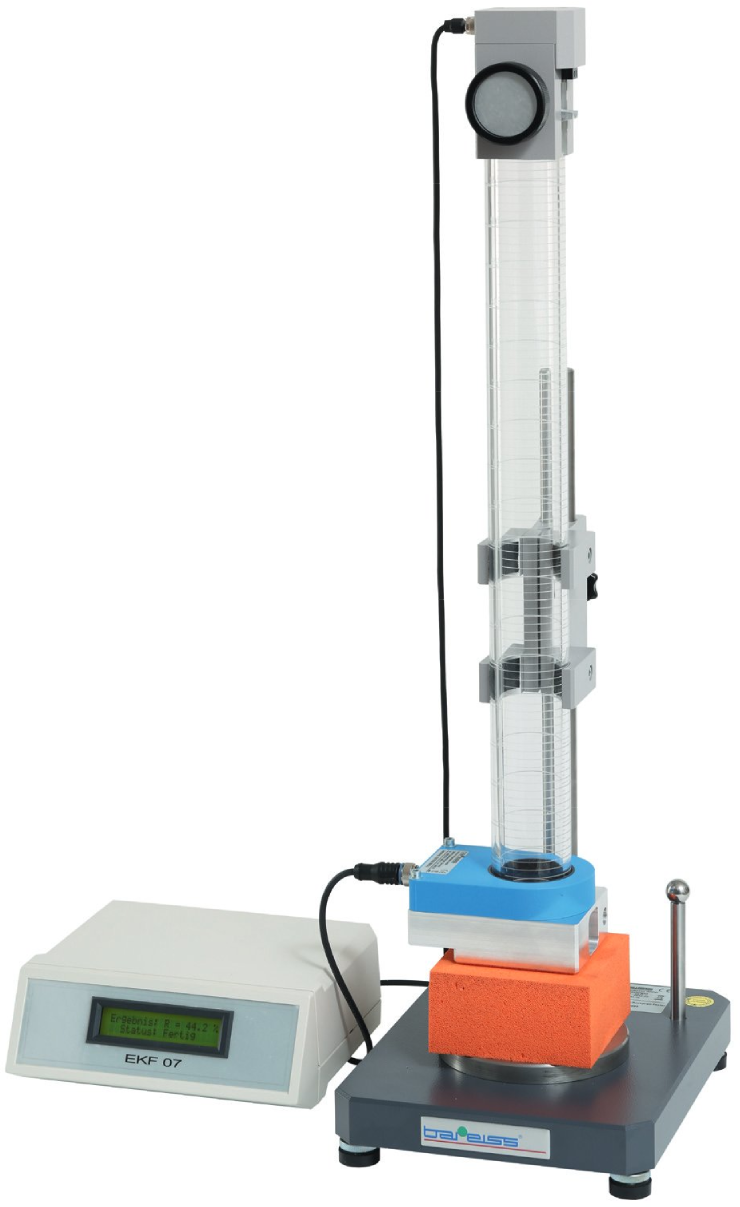
Aside from testing the resilience of materials such as foam, polyurethane and other similar materials, the Bareiss Ball Rebound Tester is a popular quality control device being used by many of the leading hybrid Mattress Manufacturers around the World. How else could we count on the best sleep possible if our mattress was not perfected using a Bareiss Resilience Tester? Another division that relies on the Bareiss rebound resilience tester is the footwear industry. Whether it is for high-end athletic footwear or everyday shoes, we all know what comfort means to our feet!
The elasticity of polymeric foam materials can be analyzed with a Bareiss Ball Rebound Tester, by measuring the rebound height of a ball after the free fall and impact on a test specimen. The 2-line LC display shows the measuring value and the median value in %. The rebound height is electronically determined through sensors. Thanks to a magnetic holder, the ball remains securely adjusted until the start of the measuring process before it is manually released with the help of the handwheel.
- The electronic unit is switched off and the encoded switch is turned to position 0 using a screwdriver.
- The clamping screw of the fixing bracket is loosened so that the downpipe is up until there is a distance between the downpipe and the sample placed on the supporting table.
- Push down the pipe carefully until the foot is in contact with the sample and tighten the clamping screw.
- Turn the knurled wheel carefully to the left until it stops and put the ball with the help of a magnet holder onto the holder plate and turn the knurled wheel carefully to the right until it stops.
- The ball is set free and falls onto the sample, take the ball out with the help of a magnetic holder.
- The measured value is transmitted via the interface to the computer.
- According to norm 3 measurements are made on 3 samples each and one median value is calculated from each series of measurements and one median value is calculated from the 3 median values.
- The electronic unit is switched off and the encoded switch is turned to position 1 using a screwdriver.
- 3 readings on 3 samples are measured and the median is displayed. Once 3 median values are obtained the final median value is displayed.
- The measured median value is transmitted via the interface to the computer.
- The electronic unit is switched off and the encoded switch is turned to position 2 using a screwdriver.
- 3 measurements are taken for preconditioning and repeat the measurements twice.
- Once preconditioning values are obtained, 3 values are obtained from 3 samples each and the final median value is calculated.
- The measured median value is transmitted via the interface to the computer.
- The electronic unit is switched off and the encoded switch is turned to position 3 using a screwdriver.
- According to norm 3 measurements are made on 3 samples each and one average value is calculated from each series of the measurement and one average value is calculated from the three average values.
- 3 readings on 3 samples are measured and the average is displayed. Once 3 average values are obtained the final average value is displayed.
- The measured average value is transmitted via the interface to the computer.
- The electronic unit is switched off and the encoded switch is turned to position 4 using a screwdriver.
- 3 measurements are taken for preconditioning and repeat the measurements twice.
- Once preconditioning values are obtained, 3 average values are obtained from 3 samples each and the final average value is calculated.
- The measured average value is transmitted via the interface to the computer.
| Test Method | Ball Ø (mm) | Ball Mass (g) | Height of fall (mm) | Operating modes |
|---|---|---|---|---|
| Single measurement | Mode 0 | |||
| Acc. To DIN EN ISO 8307 9 measurements on 3 samples 3 median values are taken, and the final median value is selected |
16 ± 0.5 | 16.8 ± 1.5 | 500 ± 0.5 | Mode 1 |
| 6 measurements 3 pre-measurements for conditioning The median value of 3 measurements is selected |
Mode 2 | |||
| Acc. To ASTM D 3574 9 measurements on 3 samples 3 average values are taken, and the final average value is selected |
16.03 ± 0.2 | 500 ± 0.2 | Mode 3 | |
| 6 measurements 3 pre-measurements for conditioning The average value of 3 measurements is selected |
Mode 4 |
- EKST test stand
- Downpipe EKF 500 – the height of fall 500 mm
- Pick up bracket, magnetic steel ball with holder
- Electronic unit
| Measuring Principle | A Ø16 mm magnetic steel ball falls freely onto the sample from a specified height of 500 mm. |
| Standardsw | DIN EN ISO 8307, ASTM D 3574 |
| Official DAkkS-Calibration Certificate | Works-Calibration certificate for 500mm ball rebound |
| Software Hard Test For Windows | System for data logging and analysis |
| Power supply | Flange power supply set INPUT : 100-240VAC; 50/60 Hz OUTPUT : 3.3 VDC |
| Measuring range | 0 - 100% |
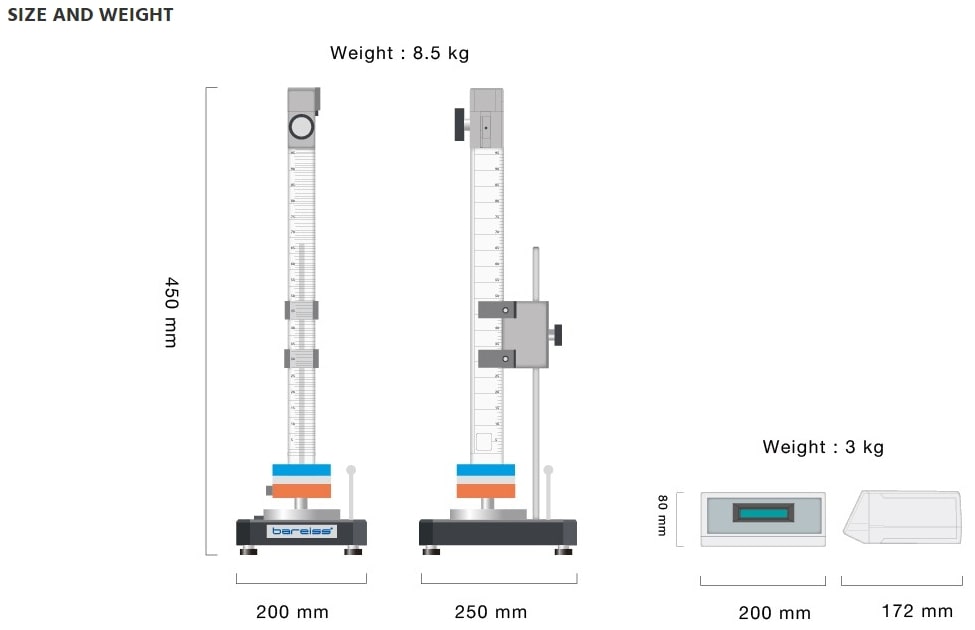
| Dimensions | Test stand with down pipe: 200 x 250 x 450 mm Electronic unit: 200 x 172 x 80 mm |
| Data output | RS 232 (Serial) |
| Weight | 8.5 kg |
Thank You
Thank you for your quote request, we will contact you within 1-2 business days.
There was an error submiting the form. Please try again.


