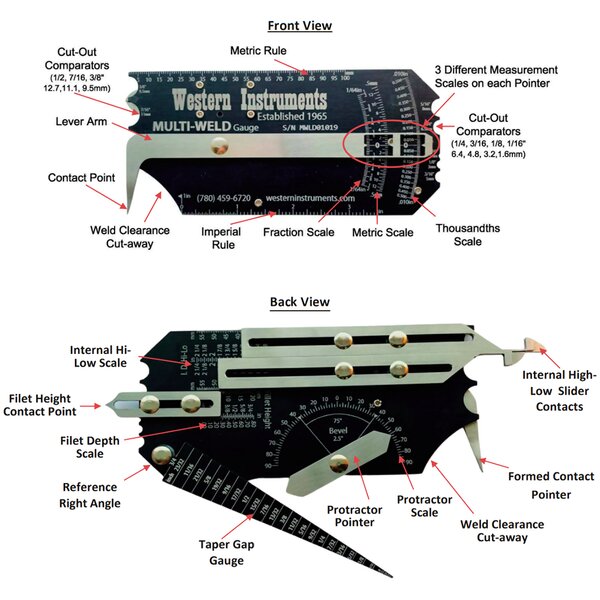
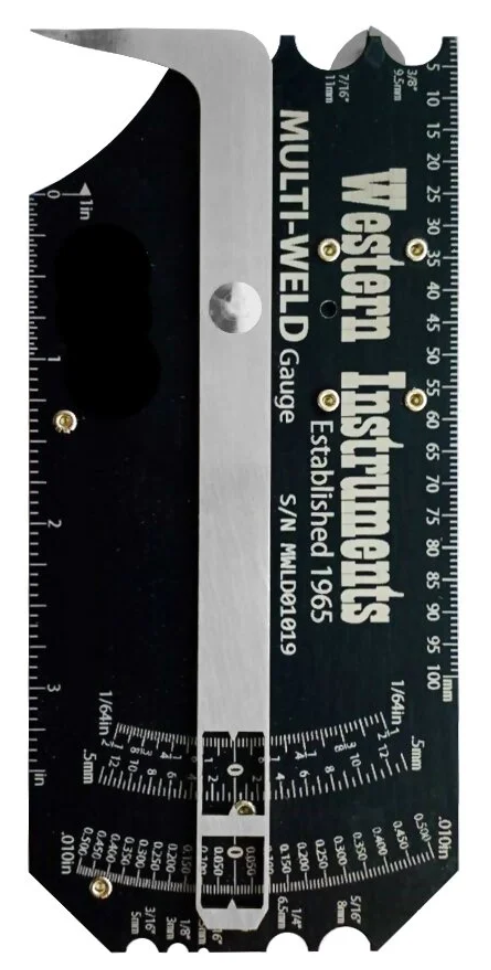
The Multi-Weld Gauge does away with Single Purpose Welding Gauges, by consolidating the functions of the 4 most popular gauges, with over 9 measurement functions. The contrast of the scales against the black background, make the Multi-Weld Gauge extremely easy to read on any of its measurement scales. The Multi-Weld is unique, a distinct improvement over existing gauges.
Weld and Fit-Up parameters are outlined in numerous industry specifications, such as; AWS, ASME, API, ANSI, ISO, DIN, CEN, and Military Specifications. Of particular importance for AWS Inspectors, the Multi-Weld Gauge will resolve and measure Undercut to +/- 0.010” (0.5mm), something no other Lever Type Welding Gauge can do.

- Internal Hi-Lo
- Gap
- Filet Height and Leg Length
- Weld Height
- Undercut Depth
- Misalignment
- Angle of Preparation
If a Multi-Weld Gauge is found to have an inaccuracy, it can be tested by Western Instruments or an authorized calibration depot. However, with the right tools and a thickness standard, one can check and re-standardize the Multi-Weld Gauge. The tools required are a small ball peen hammer, a fine file, and a thickness Standard. The Thickness Standard, preferably Cold Rolled Steel, must be less than the full deflection of the Multi-Weld’s Height/Depth range of 3 to 25mm or 0.10” to 1.00”.
After one determines the Contact Point (Height /Depth or Filet Height) is too short or long, the contact point is easily adjusted. If these Contact Points are long (low measurements), lightly file the lower angled edge, on the Height / Depth Pointer, closest to the Scale Plate. On the Fillet Height Pointer, the point is lightly filed to make it a little more flat. After each draw of the fine file, the accuracy of the corresponding Points should be checked, on both the high and low end of the Height/Depth scale.
On the Filet Height scale, the pointer's height is simply verified. If the Multi-Weld Pointers are measuring high (short Contact Point), the bottom portion of the Contact Point should be placed flat on an anvil, that is the Gauge resting on its side. Give a light flat tap, with the broad face of your small Ball Peen Hammer, to the end of the Contact Point. Again, after each tap, the accuracy of the Gauge should be checked on the scales in the manner outlined above. While standardizing a Multi-Weld Gauge in this manner, patience and thought go a long way.
The Multi-Weld Gauge has passed many experienced Welder Inspector’s critical Tests, you can put it in your back pocket, and nothing digs in!


