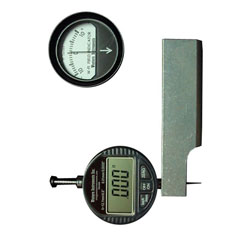
Western’s personnel have many combined years of experience in the Pipeline Construction Industry. Therefore, many of the procedures and problems associated with pipeline construction are not foreign to us. Pipeline Welding Supervisors and Consultants, are regularly ordering two different instruments from us; a Reaching Pit Gauge, and our W-FI-10 Magnetic Field Indicators. As illustrated below, both of these instruments are packaged in the same latched wooden storage box
The Reaching Pit Gauge has been selected because Yellow Jacket (and other coatings typically end far enough back from the weld that the coatings don’t interfere with the Reaching Blade sitting flat on the Pipe surface The cutaway nose, on the dial indicator end of blade, permits positioning the Dial or Digital Indicator’s Contact Point on either side of the weld.
The Reaching Pit Gauge is used to measure weld undercut, end alignment differences across the weld as well as Mill Marks. Excessive Undercut creates an area for stress concentrations, and possible cracking. Pipe alignment is necessary to ensure good weld geometry, which when not achieved, will create problems with Automatic Welding Systems. Mill Marks are a polite way of describing grinding repairs, to ensure to much material was not removed and there is enough remaining wall thickness. The same politically correct terminology is used to describe damage that can often happen when positioning the weld or moving pipe within, the bender
The W-FI-10’s are used to test for residual magnetism in the Weld. Experienced Welders know that when the beveled end of a pipe has a magnetic field over 10 Gauss, welds will be rejected by either UT or X-Ray.
Western and our Stocking Distributors can save you a little money, and give you all the versatility you need for either Corrosion, Equipment, or Weld Inspection. Let us assemble an Inspection Kit for you today.

