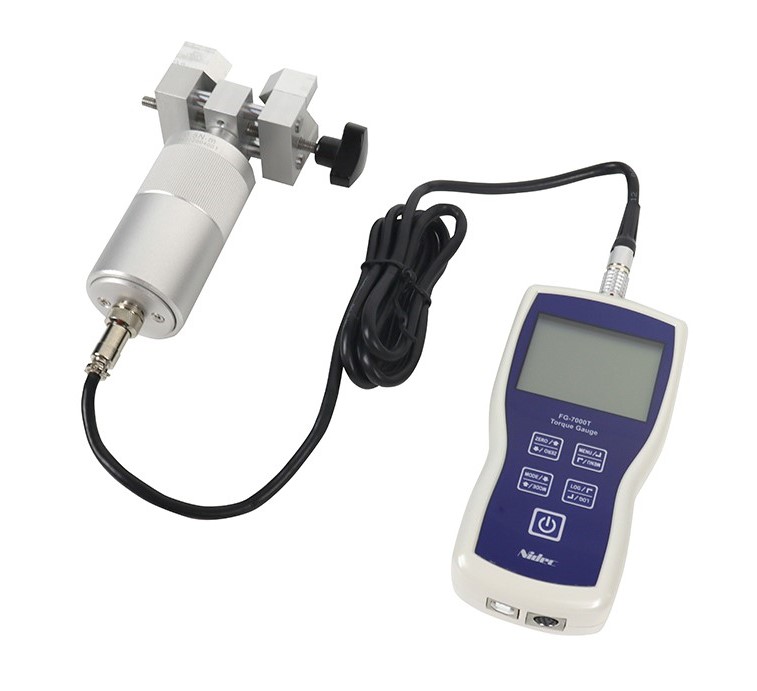
The FG-7000TA Series digital torque gauges provide testing flexibility with their external torque sensor input. Torque sensors with the adjustable clamp adapter are immediately recognized when connected to the display base. Units are available for your specific testing needs in 1 N-m (9 in-lb) 5 N-m (44 in-lb) & 10 N-m (88 in-lb) capacities.
The adjustable clamping mechanism can grip a variety of samples from approximately 0.56 to 2” (14 to 50 mm) diameters. Four selectable modes of operation include: Track mode for live readings, Peak mode for displaying the maximum reading, First Peak where only the initial peak is recorded once a decrease is sensed and Preset Mode which utilizes user-programmed tolerance alarms for go/no go testing.
The display has two selectable operations, numerical view with directional bar graph or graphical view with directional bar graph. In graphical view when alarm tolerances are set, the process is plotted in relation to the upper and lower limit graph lines. Combined with the go/no go icons, a simple pass/fail determination is recognized.
The FG-7000TA models have built-in memory for 1000 data points and can store a reading on-demand at the push of a button (for simple data acquisition) or be set to continuous data logging. Data can be viewed on the screen, sent to the optional printer, or loaded to be analyzed and graphed on the free software program. The 1,000-point memory with definable groups allows for multiple tests to be recorded and easily separated upon loading.
The Comparator Output can be set up for integration of the instrument into a quality system for repetitive testing such as on a production line. The large back-lit, 180° auto-reversible display, CW/CCW directional bar graph, combined with the dual labeled keypad allows for usage of the gauge in various positions.
Typical applications include testing to torque needed to open or close a jar or container (cap torque testing) or testing the open or closing torque on valves and door hardware, failure or destructive torque testing, or almost any torque testing requirement involving incoming quality inspection, finished goods testing to R&D.
- FG-7000TA Digital Torque Gauge with Adjustment Clamp
- Display operates in numerical or graph modes, both include a directional bar graph
- Graph mode combined with set point tolerances provides instant recognition of process relation to upper and lower limits
- Four Modes of Operation: Peak, First Peak Preset or Track Mode
- Memory with group categorization to easily separate your tests for review and later download
- Free software for viewing, graphing and analyzing data on PC
- Large, Backlit, Auto-Reversible display with various icons of test status aids user during testing
- Programmable High/Low tolerances combined with comparator NPN/PNP output allow usage in quality control production lines
- Adjustable clamping mechanism enables flexible testing from approximately 0.56 to 2” (14 to 50 mm) diameters
| Accuracy | ± 0.3% F.S. |
| Selectable Units | N-m, N-cm, kgf-cm, lbf-in (Depending on Range) |
| Overload Capacity | 120% of F.S. (LCD flashes beyond 110% of F.S.) |
| Measurement method | Peak, First Peak, Preset or Track Mode |
| Data Sampling Rate | 1000 Hz |
| Display | 160*128 dot matrix LCD with LED Backlight |
| Display Update Rate | 10 times/second |
| Resolution | (See page 2 Resolution Table) |
| Memory | 1000 data |
| Set Point | Programmable high and low limits |
| Battery Indicator | Display flashes battery icon when battery is low |
| Power | 3.6VDC 800mAH Ni-MH rechargeable batteries |
| Battery Life | Approximately 16 hours continuous use per full charge |
| Charger / Adapter | Universal USB/BM charger, Input: 110 ~ 240VAC |
| Temperature Effects | <0.054% per °F (0.03% FS per °C) |
| Outputs | USB, Serial Port RS-232, High & Low Limit NPN |
| Operating Temperature | 14 to 104°F (-10 to 40°C) |
| Storage Temperature | -4 to 122°F (-20 to 50°C) |
| Housing | Aluminum |
| Oper. Relative Humidity | 5 to 95% |
| Storage Relative Humidity | 20 to 80% |
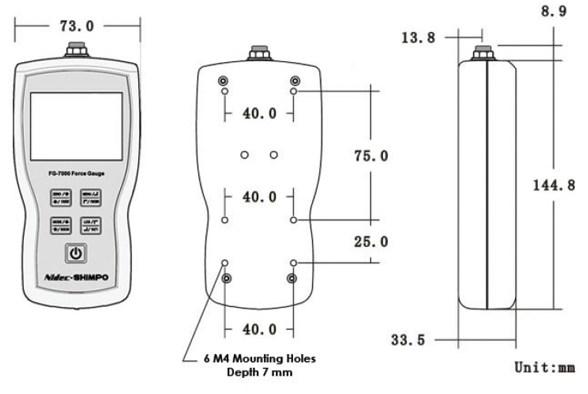
| Dimensions | Display: 5.7 x 2.9 x 1.4" (145 x 73 x 35.5 mm); Sensor: 4.1 x 1.8" (105 x 46 mm); Adjustable Clamp: 3.7 x 1.7 x 2.3" (93 x 42 x 58 mm) |
| Product Weight | 3.5 (1.6 kg) |
| Package Weight | 5.3 (2.4 kg) |
| Warranty | 1 year |
| Included Accessories | AC Adapter/Charger, USB cable, carrying case, calibration cert. |
| Models | N-m | N-cm | kgf-cm | lbf-ft | lbf-in | Interface Type | |
|---|---|---|---|---|---|---|---|
| FG-7000TA-1 | Capacity | 1 | 100 | 10 | - | 8.9 | Adjustable Clamp 14.29 - 50.23 mm (0.56 - 1.98") |
| Resolution | 0.001 | 0.1 | 0.01 | - | 0.005 | ||
| FG-7000TA-2 | Capacity | 5 | 500 | 50 | 3.68 | 44.3 | |
| Resolution | 0.001 | 0.1 | 0.01 | 0.001 | 0.01 | ||
| FG-7000TA-3 | Capacity | 10 | 1000 | 100 | 7.38 | 88.5 | |
| Resolution | 0.01 | 1 | 0.1 | 0.001 | 0.01 | ||
| Item | Description | Price | ||
|---|---|---|---|---|
FG-7000TA-1 | Torque Tester with Adjustable Clamp, 8.8 lb-in / 1 Nm | $1,450.00 | ||
| Accessories | ||||
NIST-TORQUE | NIST Traceable Certificate of Calibration, Includes Data Points. Up to 100 N-m | $300.00 | ||
In stock
1 Week Lead Time (Estimated)
2-3 Week Lead Time (Estimated)
Lead Time Varies, Please contact us for availability.
Unavailable


