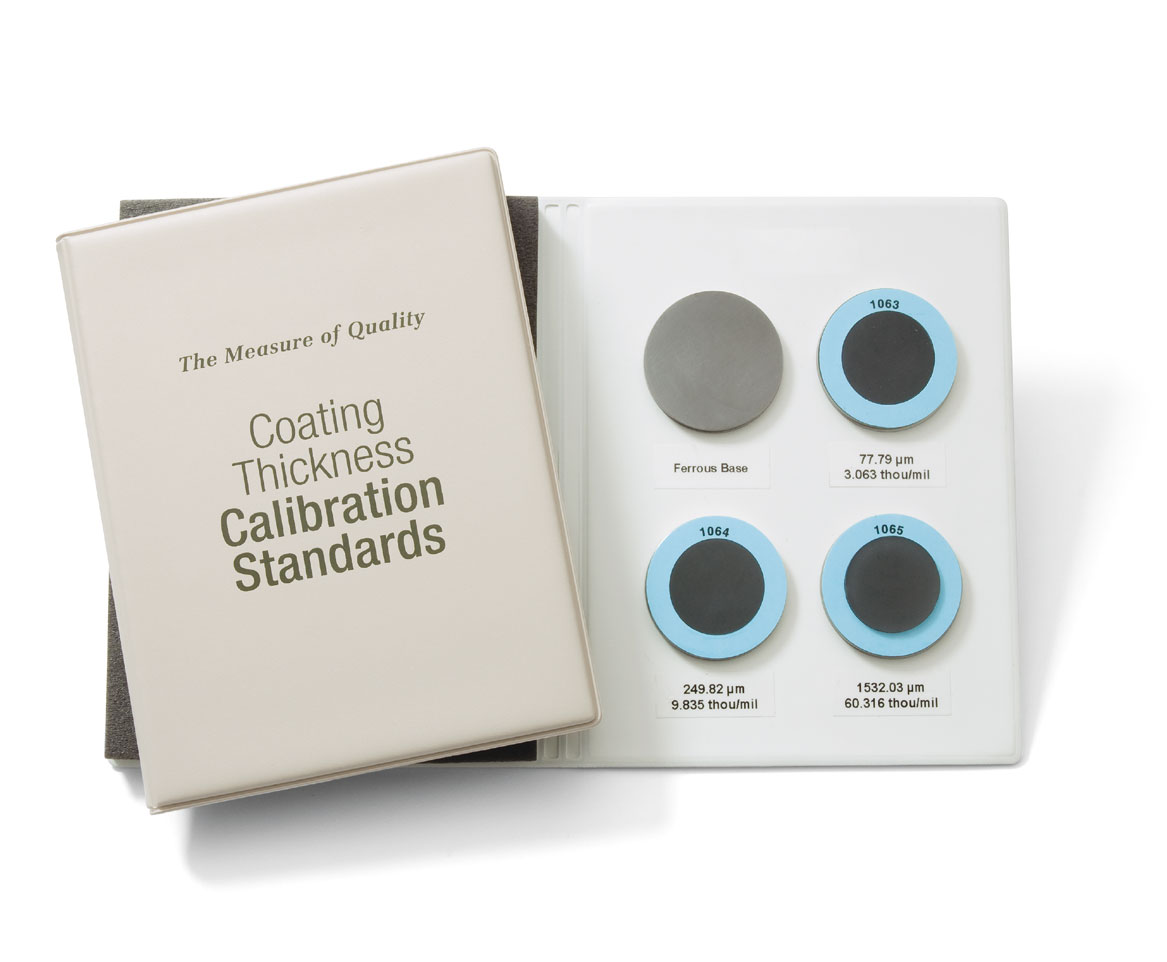
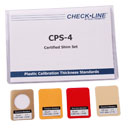
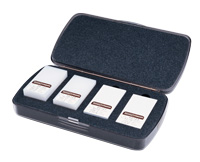
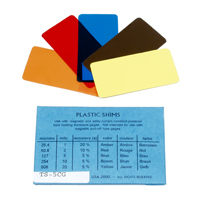
Many organizations require verification of gage accuracy at the test site each time a coating thickness gage is put into service and at frequent intervals during use. Ideal for this purpose, certified coating thickness standards have measured values traceable to PTB - The National Metrology Institute of Germany.
- Certificate of Calibration Traceable to PTB
- Used to verify the accuracy and operation of any Type 1 (mechanical) and Type 2 (electronic) magnetic, eddy-current or ultrasonic coating thickness gage
- Certified and labeled in both Metric and Imperial units
- Individually serialized
- Ideal for use in the calibration lab, in the field or on the factory floor
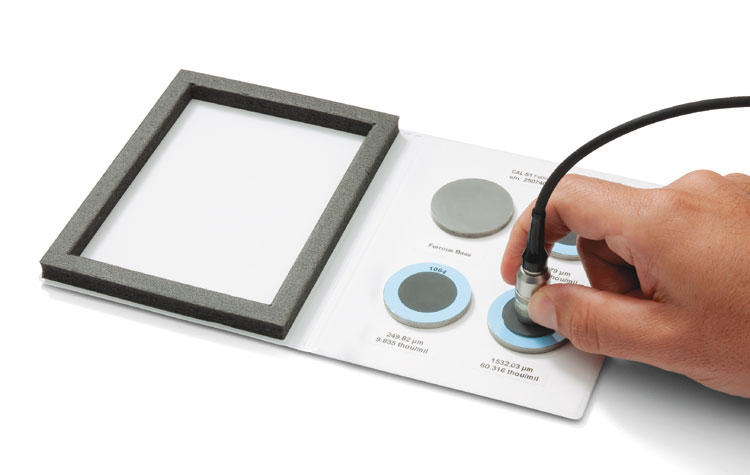
- Standards with steel or aluminum substrates consist of 4 plates mounted in a protective binder
Item |
Ideal for | Coating/ |
STD-S1 |
PosiTector
6000 |
Epoxy |
STD-S2 |
PosiTector
6000 F0S, F45S, F90S PosiTest DFT Ferrous & Combo |
|
STD-S3 |
PosiTest G & GM PosiPen A, B & C |
|
STD-S4 |
PosiTector 6000 FXS |
|
STD-A1 |
PosiTector
6000 N ,NS, NRS, FN, FNS, FNRS |
Epoxy |
STD-A2 |
PosiTector
6000 |
|
STD-A3 |
PosiTector
100B, 200, 200B |
| Item Number |
Base Material |
Approximate Thickness | Accuracy | |||
| Plate 1 | Plate 2 | Plate 3 | Plate 4 | |||
STD-S1 |
Steel |
0 |
75 um |
250 um |
1500 um |
± 0.43 um |
STD-S2 |
Steel |
0 |
75 um |
250 um |
1000 um |
|
STD-S3 |
Steel |
0 |
15 um |
40 um |
100 um |
|
STD-S4 |
Steel |
0 |
75 um |
1000 um |
1900 um |
|
STD-A1 |
Alum. |
0 |
75 um |
250 um |
1500 um |
± 0.43 um |
STD-A2 |
Alum. |
0 |
75 um |
250 um |
500 um |
|
STD-A3 |
Alum. |
75 um |
125 um |
250 um |
500 um |
|
Certified thickness Standards are used to verify the accuracy and operation of coating thickness gages and are an important component in fulfilling both ISO/QS-9000 and in-house quality control requirements. Contracts often specify that coating thickness measurements be taken by gages whose measurement accuracy is traceable to a National Metrology Institute such as NIST or PTB.
Standards are typically purchased as an accessory to coating thickness gages. Many customers find it more practical to verify the accuracy of their own gages in-house, rather than utilize the manufacturer’s calibration services. This is particularly true when many gages are in use and/or when accuracy verification is performed often.
What are my Choices?
There are 5 types of coating thickness Standards available from the manufacturer:
-certified coated metal plates
-certified polystyrene blocks
-certified plastic shims
-non-certified plastic shims
-zero plates
How do I select the appropriate product?
Certified Coated Metal Plates are the best solution for verifying the calibration, accuracy and operation of most magnetic, eddy current or ultrasonic coating thickness gages including magnetic pull-off gages as well as many competitive models. They fulfill both ISO and in-house quality control requirements. At ±0.43 Certified Coated Metal Plates are our most accurate solution. A durable epoxy coating over 1018 steel or 6061-T6 aluminum and protective binder ensures long life. Prices range from $95 for individual plates to $325 for a set of 4 plates.
Certified Polystyrene Blocks are for use with gages that measure over 1500 µm (60 mils) with an accuracy of ±(2.5 µm + 0.05% of thickness) [±(0.1 mil + 0.05% of thickness)].
Certified Plastic Shims (foils) provide an economical alternative with a reduced accuracy of ±2 µm (±0.08 mil). A coating thickness gage measures shim thickness when placed over a smooth metal surface (zero plate). Alternatively, they can be placed over the customer’s uncoated substrate. They are not suitable for use with magnetic pull-off gages. Prices range from $45 for individual shims to $195 for a complete set of eight different thicknesses.
Non-Certified Plastic Shims (foils) provide a quick operational check of the instrument and they allow the user to perform practice measurements when placed over metal. A set is included with every electronic coating thickness gage. They are not suitable for use with magnetic pull-off gages. Price for a set of five is $10.
Zero Plates are uncoated steel or aluminum disks that cost $55 each. A zero plate is included with most coated metal sets. The first gage measurement is on a zero plate to verify that the gage measures zero correctly. Electronic gages can usually be adjusted to “0” if necessary. A zero plate is also a convenient base onto which a plastic shim or polystyrene block can be placed for measurement.
How often should they be changed/replaced?
Standards should be replaced when they become visibly worn or scratched.
Why should I use certified coating thickness STANDARDS to verify the accuracy of my gage when I have plastic shims?
Your electronic PosiTector and PosiTest gages come with NON-CERTIFIED PLASTIC SHIMS for use as a quick reference out in the field or on the floor. But these non-certified plastic shims are not ideal for verifying gage accuracy for the following reasons:
-they are not certified or traceable to any national body.
-their accuracy is far less than most of the gages being verified.
-they cannot be used with Type 1 mechanical gages, such as our PosiTest FM or PosiPen.
-their thickness may be inconsistent due to pressure from probe tip
-they may suffer distortion due to environmental conditions such as temperature
We include non-certified shims with our electronic gages to provide a quick verification of gage operation and allow the user to perform practice measurements when placed over metal.
Can these Standards be used with other manufacturer’s gages?
Yes, our Standards may also be used with many competitive gages provided they operate on magnetic, eddy current, or ultrasonic principles.
How do I select the appropriate set of Standards?
Certified Standards are used to verify the accuracy and operation of a coating thickness gage. Select the Standard that most closely matches the measuring range of your gage. See our Ordering Chart for assistance.
Can Certified Coating Thickness Standards be recertified?
In most instances, it will be more economical to trade-in Standards for a new set. Trade-in reduces the price of new Standards by 20%.
What are zero plates used for?
1. Coated metal Standards for magnetic and eddy current gages usually include a zero plate. The first gage measurement is on the zero plate to verify that the gage measures zero correctly. If not, electronic gages can usually be adjusted to “0” on the zero plate. Alternatively, some specifications allow the measured difference from zero to be subtracted from future coating measurements.
2. A zero plate is also a convenient base onto which a certified or non-certified plastic shim can be placed for measurement.
3. For best accuracy it is important to ensure a coating thickness gage meaures "0" on the uncoated substrate and adjusted to "0" if necessary. This is especially true when the substrate is rough, shaped, extremely thin, or is an alloy. When an uncoated piece of the material is not available for a zero check, some procedures call for the gage to be adjusted to "0" on an uncoated zero plate. A compensation value is then subtracted from future coating measurements.
4. Zero plates are also used to provide a substrate where none exists. Large sheets of material such as paper, plastic, fabric and rubber can be measured with a coating thickness gage by placing the material over the zero plate. This is useful when the measured item is too large to access with a micrometer or other device. The screen printing industry uses zero plates to measure the thickness of the "substrate" being printed.
What are SHIMS?
Shims, sometimes referred to as foils, are small, colored plastic strips of varying thicknesses between ~25 µm (1 mil) and ~1.5 mm (60 mils). They measure 3 x 8 cm (1 x 3 inches). Shims are commonly used to simulate a coating.
For electronic magnetic and eddy-current gages, they are placed onto an uncoated piece of ferrous or non-ferrous metal, and then measured with the gage. Shims may be used individually or stacked to create additional thicknesses.
Ultrasonic coating thickness gages can only measure one shim thickness at a time. The shim must be placed over a flat, rigid object such as a glass pane. The substrate material does not have to be the same material as the material being tested.
What is the difference between CERTIFIED and NON-CERTIFIED plastic shims?
Although they are made of the same material and cut to the same dimensions, there is a difference in accuracy, packaging and purpose. Neither is suitable for use with magnetic pull-off gages.
Certified Plastic Shims (foils) provide an economical alternative to coated metal plate Standards with a reduced accuracy of ±2 µm (±0.08 mil). Gage performance can be conveniently verified in the field or in the lab on a regular basis as called for by some international test methods. Shims are placed over a smooth metal surface (zero plate) and a measurement taken. These strips of flat polyester can be used to adjust (optimize) a coating thickness gage in the intended range of use directly over the customer's uncoated substrate.
Certified Plastic Shims are sold individually or as a complete set of eight. Each Certified Shim is individually serialized and labeled with its measured thickness (mils and microns) obtained with measurement equipment traceable to NIST. They are packaged in their own plastic protective pouch. One Certificate of Calibration showing traceability to NIST is included with each shim or set of shims. Their labeled thicknesses are accurate to within ±2 µm (±0.08 mils). They are for use with electronic magnetic, eddy-current and ultrasonic coating thickness gages.
Non-Certified Plastic Shims (foils) are used to provide a quick verification of gage operation when placed over metal and they allow the user to perform practice measurements.
Non-Certified Shims are sold as a set of five packaged in one cardboard envelope. Their labeled thicknesses have accuracies ranging from ±5 to 20%. One set is included with each electronic coating thickness gage. They are for use with electronic magnetic, eddy-current and ultrasonic coating thickness gages.
What are other purposes of CERTIFIED and NON-CERTIFIED plastic shims?
-Probe protection: Shims can be placed over rough or hot surfaces to protect the probe from physical damage. Coating thickness is obtained by subtracting the shim thickness from the total measurement of the shim and the coating.
-Force distribution: Shims can be placed over soft/tacky coatings to prevent the gage probe from depressing the coating film. Again coating thickness is obtained by subtracting the shim thickness from the total measurement of the shim and the coating.
-Rough surface calibration adjustment: Since gages are verified for accuracy using smooth-surfaced Standards (or using a smooth zero plate), a compensation value may be required if the substrate to be coated is different from the Standard or roughened from the manufacturing process (for example, castings) or from abrasive blast cleaning. This is known as a Base Metal Reading or BMR. The BMR is the effect of substrate (for example, surface profile) on a coating thickness gage. The user obtains several readings on the prepared, uncoated substrate. The arithmetic mean of these values becomes the Base Metal Reading. The BMR is deducted from the coating thickness values in order to report the thickness of the coating layer(s) over the surface profile.
-One-point calibration adjustment: A one-point adjustment involves fixing the gage’s calibration curve at one point after taking several readings on a single coating thickness Standard, shim or reference sample. Adjusting to zero on an uncoated sample of the test specimen is the simplest form of a one-point adjustment (see rough surface calibration adjustment above). If the user elects to perform a one-point adjustment procedure to a known thickness, a reference sample or shim representing the target range of gage use should be selected and a measurement taken. If the value displayed by the gage is within the combined accuracy of the shim and the stated gage accuracy, then no adjustment is necessary. If the gage reading is outside the combined accuracy of the shim and the stated gage accuracy, then the user should carefully follow the gage's instructions for proper adjustment.
-Two-point calibration adjustment: A two-point adjustment fixes the instrument's calibration curve at two known thicknesses. Coated reference samples or shims placed over the uncoated substrate or over an uncoated reference sample may be used. The two thicknesses selected must be on either side of the expected coating thickness. It is recommended that the gage be verified for accuracy during the measurement procedure and after the coating thickness measurements have been acquired.
How accurate can SHIM measurements be?
When adjusting to a shim thickness, resultant gage measurements are less accurate and must be recalculated by taking into account the tolerances of both the instrument and the shims. When shims are used it is necessary to be aware of the possibility of additional measurement errors. Factors experienced with plastic shims that are not usually present with coated metal plate Standards include (but are not limited to):
-permanent creases in the shim due to bending around substrates,
-gaps between the shim and substrate,
-variations in the ability of the shim to mold to rough substrate surfaces is dependent on the thickness and rigidity of the shim,
-distortion due to environmental conditions such as temperature and humidity,
-an inherent curve in the shim which can act as a leaf spring and cause a magnetic pull-off gage to be “pushed” off the surface prematurely, resulting in an incorrect reading,
-thickness inconsistencies over the shim surface area,
-ridges along the shim edges caused by the cutting and trimming processes,
-permanent “dimples” in the shim due to the pressure of the probe tip,
-with some materials, shapes and shim thicknesses it is possible that the shim will not lie flat to the surface.
Why can’t I use SHIMS with pull-off magnetic gages?
Shims, which are permissible for adjusting electronic gages with constant pressure probes should not be used for adjusting mechanical pull-off gages including the PosiTest FM and PosiPen. Shims can act as a leaf spring and cause the probe of a magnetic pull-off gage to be "pushed" off the surface prematurely, resulting in an erroneous reading.
Can SHIMS be re-certified?
Yes, but the cost effective alternative is to trade them in on the purchase of new ones when they become visibly scratched or worn. Trade-in reduces the price of new Certified Plastic Shims by 20%. Additionally, one or more shims can be purchased separately to complete a set.
Do standards require periodic maintenance?
Coated metal standards require little maintenance. If plates become dirty, the epoxy surface can be gently cleaned with a cotton swab dipped in isopropyl alcohol. Do not clean the exposed metal surfaces with alcohol as this will remove any protective films. To prevent rusting, the steel standards come complete with corrosion inhibitor paper and may require periodic application of a light machine oil or 3-in-1 oil to the exposed metal surfaces. Do not apply oil to the epoxy or labeled surfaces. The aluminum plates should not require any maintenance to the exposed metal surfaces. When not in use, all coating thickness Standards should be stored in a cool, dry place.
Exposure of the epoxy covered steel to magnetic fields may cause the plates to become slightly magnetic. Magnetism in steel plates can affect readings taken with gages using magnetic principles. Do not store epoxy coated steel plates near magnetic sources. If your plates get exposed to a magnetic source they can be restored by using a degausser.
Why do polystyrene blocks have velocity measurements on their labels?
The polystyrene thickness standards are recommended for use with several models of ultrasonic gages. Ultrasonic gages emit a high frequency pulse of sound that travels through the material and reflects back when it encounters a different density material. The thickness of the material is calculated based on the time for the reflection (or echo) to be received and the speed of the sound in the material. Most ultrasonic gages are preset with a ultrasonic velocity that is representative of most coatings. Improved accuracy can be achieved by adjusting the gage's ultrasonic velocity to exactly match the material being measured. Some gage models allow you to directly input the material's velocity if it is known. Other models calculate the material's ultrasonic velocity by measuring a known thickness of a representative material. The manufacturer provides the ultrasonic velocity to allow the calibration standards to be used with either method.
My calibration certificate indicates measurements are traceable to PTB, what is PTB? Each national body has an organization(s) responsible for coordinating the national measurement system that provides traceability of measurement results to reference standards that are internationally recognized. The body in the US responsible for this is National Institute of Standards and Technology (NIST). If equipment is calibrated in another country the calibration of that equipment will reference the respective nation's responsible organization. Physikalisch-Technische Bundesanstalt (PTB) is Germany's equivalent of NIST.
| Item | Description | Price | ||
|---|---|---|---|---|
STD-S4 | PTB Certified Epoxy Coated Steel Plates, with max coating of 75 mils / 1900 microns - STDS4 | $385.00 |


